Showing posts with label recipe. Show all posts

Monday, September 9, 2013

Blueberry Pieish Salad

No, there are no sugars, sweetners, anything added to this salad that resembles sugar other than the blueberries and the coconut. No, there is no guarantee that your salad will actually taste like blueberry pie. The combination of the coconut, berries, and cashews reminded me of it a little, though.

Ingredients:

  • salad greens (I prefer romaine, chopped)
  • handful of blueberries
  • couple of pinches of shredded coconut
  • small handful of cashews
  • 1 tsp coconut oil, melted
Rinse your salad greens. Toss with blueberries, shredded coconut, and cashews. Drizzle with the melted coconut oil. Enjoy!

Friday, September 6, 2013

Cinnamon Eggs

Yep, you read it right. Cinnamon eggs. Scrambled eggs with cinnamon. And coconut (which is optional but not as good without).

Let me back up a second. Who's heard of the Whole9 or Whole30 program? The idea is that for 30 days, you eat nothing but meat, veggies, a little bit of fruit, and maybe some nuts. You don't eat grains, legumes, dairy, any kind of sugar (including chocolate), or foods that resemble anything processed and packaged and treat or cheat like (such a Paleo-brownies or Paleo pancakes).

Well, I like my chocolate and I like delicious glucose bombs (aka bananas) at the end of the day for a sweet moment of ... well, sweetness. Only thing is, on a Whole30 protocol, I wouldn't be able to have either one of those. Maybe some fruit, but not a baked banana with chocolate chips.

Then, Super A made breakfast. And whoa was it pretty darn sweet (without any added sugar or fruit).

Ingredients:
  • eggs
  • onion (chopped or diced)
  • butter
  • cinnamon
  • coconut flakes (unsweeted, optional)
Melt the butter (or coconut oil) in a frying pan on the stove. Scramble the eggs, but add in the cinnamon, onion, and coconut flakes as they cook. Keep mixing. You should add enough cinnamon that you can see it everywhere in your eggs. Serve immediately

I'm actually going to ask him to make it again this weekend, because it was so yummy last time we had it!

Thursday, September 5, 2013

Slow Cooker Cinnamon Garlic Chicken

This week is moving week, and there are two things I knew coming into it:
  1. I needed to not get a ton of food at TJ's, because I would need to move it all.
  2. I would be coming off a race weekend, be tired, and generally not want to cook.
So I decided to whip out the handy dandy slow cooker. It needed to be something that would last a few days in the fridge, leave me full afterwards, and not be too time consuming for the prep-work. Also, it had to be delicious. I've really been into cinnamon lately, so when I found this recipe for chicken legs, it sounded just about perfect.

Note: this recipe is in portions for a 6 quart slow cooker. You might need to make adjustments if yours is smaller.

Ingredients:
  • 2-3 lb chicken legs
  • 1 onion, chopped or diced
  • butter (optional, add on top of everything)
  • 5-6 cloves garlic, smashed (not chopped or diced at all!)
  • 1 tbsp cinnamon
  • 1 tsp cumin
  • 1 tsp paprika
  • 3-4 tbsp chicken broth, white wine, or water
Toss the chicken in the pot. Dice the onions, smash the garlic, and add them to the pot. Add the spices and the water. Cook on medium-high heat for 3-4 hours.

The original recipe called for a full tablespoon of cumin, but I like my food a little less spicy (and I think Abbs might have accidentally snagged mine), so I left it out. It probably needed it. I don't think I can emphasize enough to make sure your chicken is cooked through. If you find pink bits (which I did as I made this the night before and was slightly impatient to go to bed), put them aside and nuke them (politely of course) in the microwave for a minute or so until the pink goes away. Also, you don't need to add that much water. It might look like it, but you don't.

Now I have a meal that lasted 2 nights and meant I didn't have to actually cook anything. Cue the packing!

Tuesday, August 27, 2013

Cinnamon Maple Syrup Dip

This is intended to go with the Homemade Crabby Sweets, but it's also just a good dip. I'd make it for carrots, maybe even celery, too. That's how Super A and I tested it while we were waiting for the fries to be done. I made a double batch and brought the leftovers to work this week for my carrots.

Ingredients:
  • 1 cup plain Greek yogurt
  • 1/4 cup maple syrup
  • 1 tsp cinnamon
Mix all ingredients until well combined and serve! Note: don't make it in the container the yogurt came in, it will most likely overflow.

*** I will be trying this again with less maple syrup. Stay tuned!

Saturday, August 24, 2013

Homemade Crabby Sweets

This summer, I was introduced to Crabby Sweets. Normally, I'm not a fan of sweet potato fries. I don't know what it was about these - maybe the Old Bay, maybe the maple-syrupy dipping sauce, maybe my tastebuds are changing that much - but they were delicious. Abbs, sweetheart that she is, made some a few weeks ago (sans maple syrup dip). She and our friend who was over for dinner passed after a few fries, so guess who ate most of the bowl? Yup. No regrets, they were fantastic.

Ingredients:
  • 3 large sweet potatoes
  • Old Bay seasoning
  • coconut oil or other cooking fat, melted (don't use olive oil for this one!)
  • salt, if desired
Heat the oven to 450 F and line a baking sheet with aluminum foil (for much easier clean-up).

Peel the skins off your sweet potatoes. Despite what people think, the skins actually hold a lot of anti-nutrients, so you don't really want to eat them. Besides, this is easier than scrubbing them. Cut them up lengthwise, like fries. Or alternately you can make potato wedges, it's up to you. But stick to one or the other, and aim for similarly sized pieces or they won't cook through properly.

In a bowl, combine your potato sticks, melted cooking fat, and spices. Yes, this involves getting your hands dirty. When the oil and spices evenly coat each fry, put them on your baking sheet in a single layer and stick it in the oven. Let them cook for 15 minutes, then flip them over and cook for another 15 minutes. If you want crispier fries, I suggest (but haven't tried!) putting them on the top shelf and turn the oven to broil for the last few minutes.

Yumyumyum! We only cooked them for 20 minutes on one side, but Super A cut them really thinly so they were nice and soft, well cooked but still held their form. I have to say, they were pretty amazing (and cost less than $7.50 - what I'd normally pay on the boardwalk)!

Thursday, August 22, 2013

Spaghetti Squash and Meatballs

Last year was the first time I was introduced to spaghetti squash. It's like magic - a vegetable that, when cooked and "attacked" with a fork, turns out looking like one of my favorite but definitely not Paleo foods. I had one hiding in my fridge, as well as some tomato sauce and ground beef, so the solution was obvious: made spaghetti and meatballs.

Ingredients:

  • 1 spaghetti squash or 3-4 zucchini
  • 1 lb ground beef
  • tomato sauce
  • spices
Prepare your noodles. For the spaghetti squash, I actually made it in the microwave. Cut it in half longways, scoop out the seeds, and coat the edges and inside with cooking fat of your choice. Lay the squash open side down in a glass container or microwave safe dish. Cook for 5 minutes in the microwave on high, rotate dish and squash halves, and cook for at least 3 more minutes. Test with fork and cook more as needed. 

Meanwhile, add your spices to your beef (I used oregano, basil, a generic spice mix, salt, pepper, and garlic powder). Mix well. Abbs suggested adding an egg, but it's optional. Heat a frying pan on the stove and add cooking fat. Form the beef into balls and put in pan. Let cook, making sure they don't burn. Flip as needed. Cooking time will differ depending on how big you made your meatballs. When the meatballs are cooked, add your tomato sauce to the pan (to warm the sauce). Turn the heat down to simmer.

When everything is ready, run your fork through the squash to make spaghetti strands. Since there were only two of us, we used the squash halves as bowls. Put your meatballs and sauce on top and serve!

Thursday, August 1, 2013

Butternut Squash Noatmeal

Ah, oatmeal. That good ol' stick to your ribs, totally not Paleo breakfast food. Best made by a parent on a stove on a cold Saturday morning, complete with hot chocolate and snow outside. Also highly enjoyed by children when it's the instant oatmeal with sugar eggs that dissolve into dinosaurs when hot water is added.

Instant oatmeal. I shudder slightly at those words (despite consuming plenty of it myself in the past). Society, you're doing it wrong.

Last week I started thinking about how delicious oatmeal is and that it's one of those meals I still miss occasionally. So when I went to the grocery store, I had to get some butternut squash. I know what you're thinking - those two things have nothing in common, what are you talking about, Jenna? I'm talking about noatmeal!

I first saw the idea on Mark's Daily Apple. His recipe calls for a banana, 3 eggs, a couple handfuls of nuts, nut butter, and a food processor. That sounds like a lot of work for someone who's looking for a quick and easy meal in the morning (and doesn't particularly want eggs - not blasphemy, it happens to the best of us). I liked the idea though, so I kept looking around. Most of the recipes called for bananas. I love bananas. Sounds perfect, right? Well, Super A just told me that bananas have something like 27 grams of carbs per 100 grams, and I know they're packed with sugar - a lot of recipes that call for bananas say adding more sugar is optional. Plus I like my sweet treats at the end of the day, which usually involve a mashed banana. Plus I'm trying to get more veggies as part of my daily food intake. Pumpkin noatmeal sounds good, but they don't have pumpkins (canned or regular) at my Trader Joe's yet.

But they have butternut squash. Already cut up butternut squash. Easy to cook butternut squash chunks.

It probably would have cooked quicker if I had cut the cubes smaller, but it worked pretty well. I sauteed my squash chunks in a frying pan over low-low medium heat for (accidentally) an hour. I believe they're supposed to be done after about 15 minutes, but I was cleaning up some stuff and forgot. Luckily they didn't burn, the heat was low enough. I dumped the chunks into a container, mashed them up, and put them in the fridge for the night. Cooking the squash is the main prep needed for this recipe.

Ingredients*:
  • 1 cup butternut squash, cooked and mashed
  • 1 cup almond milk
  • 2 "shakes" (1-2 tbsp) almond flour
  • 2 eggs
  • Handful of chopped walnuts
  • Cinnamon (I used lots)
Put the squash, almond milk, and nuts/nut flour into a saucepan on medium heat and stir until combined and warm. Add the egg and stir until mixture is uniform and cooked (3-5 minutes). Remove from heat and add cinnamon and more nuts if desired. I sprinkled my noatmeal with cinnamon, stirred it in, and then sprinkled it again.

It's good hot (like regular oatmeal) or chilled in the fridge for a while (like pumpkin pie). Enjoy!

*This recipe could easily be halved or doubled. The amounts listed were sufficient to fill me up completely for a couple of hours. Also, I don't actually know exactly how much I used of each ingredient as I didn't measure. (Come on, when you're running around in the morning would you measure, or just say "Hmmm, this looks like a good amount of that" and move on?) This is more of a guideline, adjust as needed. Start with less almond milk and add if it looks too dry. With the cinnamon it was sweet enough that I didn't feel the need to add honey.

Tuesday, July 30, 2013

Avocado Pineapple Burgers

So yummy! Don't think I have a picture for this yet, but I'll take one the next time I make them.

Ingrediants
  • 1 avocado
  • 1/3 of a lemon
  • 1 lb ground meat (used beef)
  • 1 onion
  • Mushrooms
  • Garlic
  • Spices
  • 1 pinapple
Mush the avocado in a bowl. Squeeze in the juice from the lemon. Set mixture aside.

Cut the pineapple into desired sized chunks.

Season the meat. Separate into quarters. For each quarter, divide it in half. Make each half into a small patty. Spread the avocado mixture on the patty. Put the second patty on top of the first one and fold the edges together  If you don't get them all the way together, that's ok, just know that avocado will leak into your pan/onto your grill. Repeat for the remainder of the burgers.

Heat the pan and place 2 burgers in it. If you have a lid, cover the pan. You want to cook the burgers on medium heat. Flip when sides start to brown.

While the first burgers are cooking, saute the onions (chopped as desired), mushrooms, and garlic in another pan. Use as a topping or a side. 

Place the pineapple or onions and mushrooms on top of the burgers and enjoy!

Monday, July 22, 2013

Easiest Breakfast Ever?

They say breakfast is the most important meal of the day. I don't doubt that. I've found over the past few years that skipping breakfast leaves me cranky and ravenous by noon. I don't quite have that problem anymore, but I still agree that breakfast is the most important meal of the day. Breakfast sets the tone for the day (if that day is Monday, it can set the tone for your week). A nice, yummy, relaxed breakfast leaves you refreshed and ready for anything. A stressed running-out-the-door-late-for-work breakfast leaves you haggard and can very easily result in falling off the Paleo wagon for a meal.

This meal has been my go-to for the past week or so. It's got protein and fat from the eggs and ham and you get a nice serving of veggies and vitamins and minerals from the spinach.

Ingredients:

  • 3 eggs
  • large handful of spinach
  • 2-3 slices of ham
  • seasonings (salt, pepper, and garlic powder are my favorite right now)
  • cooking fat (I'm using bacon grease that I store in a jar in my fridge)
Heat your cooking fat in a pan on the stove. When it's warm, drop in chunks of your ham and all the spinach. Let cook until the spinach is dark green and the ham is starting to brown. Crack your eggs into the pan and mix it all up for a pseudo omelet. When the eggs are mostly cooked, add your spices and sprinkle on the cheese. If it's circle shaped, fold the eggs in half to make a nice omelet looking thing. Remove from pan and enjoy!

I've actually been putting mine straight into a to-go container and eating it at work with some tea once it's cooled a bit. Use whatever add-ins or seasonings you want, this is just my current favorite.

Sunday, July 14, 2013

Chocolate Truffles

I've been trying to work extra long days at the beginning of the week so I can take Friday afternoons off to grocery shop and run errands. A couple of weeks ago, I gave in and bought coconut oil and coconut milk - mostly so I could make this recipe by Michelle over at Nom Nom Paleo.

Michelle makes her truffles into balls, but I ended up sticking the entire "pan" (my pan was a Chinese takeout container) in the freezer and realized they'd make a great, rich fudge too. I cut them into squares. I'd recommend doing that at the 4 hour mark, before freezing them.

Ingredients:

  • 10 oz dark chocolate (70% or higher)
  • 3 tbsp coconut oil
  • 1 cup coconut milk
  • 1 tsp vanilla
Very carefully shave the dark chocolate into small pieces. Going on the diagonal seemed to work best for me. Put the dark chocolate into a bowl with the coconut oil. Don't worry about melting it.

In a saucepan, bring the coconut milk to a simmer. Pour it into the bowl and gently stir until the chocolate is melted and everything is thoroughly combined. Add vanilla. Pour mixture into a tray/pan and place in refrigerator for 4+ hours. 

Scoop out truffles and shape into balls. Roll in cocoa powder or shredded coconut. 
OR
Cut truffles into squares.

Keeps in the fridge for about a week or in the freezer for 3 months.

If keeping in the freezer, Michelle says to put the truffles in the fridge for a half an hour before serving. I'm keeping my squares in the freezer and whenever Super A wants one, we just take it straight out of the container in the freezer without worrying about defrosting. The kind of melt in your hands, anyway. Maybe that's just the type of chocolate I got. 

Happy snacking!

Monday, July 8, 2013

Cauliflower Rice

Like any other college student, I don't have a food processor (yet). Unlike most of the college students I know, I have a cheese grater.

It's beautiful.

It also means I might be able to get away with making Paleo food I would normally need a food processor for, such as cauliflower rice. This turned out a little better than I expected and it certainly filled me up. You can use any veggies you like, I used what I had on hand.

Ingredients:

  • 1 head of cauliflower
  • 1 zucchini
  • 1 lb of mushrooms
  • 1 large onion
  • 1 pineapple
  • 2 eggs
Wash the cauliflower, cut off the florets, and grate. All of it. You probably want to squeeze it out too to get rid of some of the water. Wash and chop all other veggies and the pineapple.

In a pan/wok/large saucepot (you want a large surface area), melt butter or other cooking fat (I think I used coconut oil). Cook the onion and the zucchini first, then add the mushrooms and cauliflower after a while. 

Push all the veggies and "rice" to the edges of the pan. Crack your eggs, mix, and cook for a few more minutes. Add in the pineapple slices just before you're ready to serve. Toss everything so you have well mixed rice and serve!

NB: cauliflower gives off a lot of water when cooked. I suggest squeezing it out before adding it to the pan, but cooking it briefly in the microwave would probably help get more water out of it.

Baked Bananas

This idea was my special 4th of July treat for Super A. Originally from Paleo Mom, it was inspired by the movie The Croods, which is about a family of cavemen. It's a really sweet dessert and it's even better topped with ice cream (I know, that's not really Paleo, but I can tell you it is delicious).

We sorta ate the first one before I realized it!


Ingredients:

  • 1/4 cup almonds
  • 1/4 cup pecans
  • 1/4 cup walnuts
  • 2-3 bananas
  • cinnamon
Preheat your oven to 425 F. Chop the nuts as finely as you desire. Mix with cinnamon

Put the bananas on a cookie tray. Start at the top of the banana and cut through the peel and through 3/4 of the banana lengthwise down to the base of the banana. Don't cut through the other side of the peel.

Using your fingers and maybe a spoon, put the nut mixture into the groove your just cut down each banana. Sprinkle with additional cinnamon if desired. 

Put bananas into the oven for 12-14 minutes. Allow them to cool slightly upon removal. Enjoy straight from the oven, over Elana's Chocolate Zucchini Bread, or as the base for a banana sundae.


Saturday, July 6, 2013

Elana's Chocolate Zucchini Bread

Oh. My. Gosh.

In my quest to find a flourless brownie, I decided to try a Paleo recipe that includes almond flour. Elana from Elana's Pantry came up with this great Chocolate Zucchini Bread recipe. I don't have the same sized pan that she used, so I made it in a brownie pan and added chocolate chips.

The result: fluffy, moist, chocolatey, and completely Paleo brownies. Delicious!

Ingredients:

  • 1 cup almond flour or almond meal
  • 1/4 c cocoa powder
  • 1/2 tsp baking soda
  • 2 large eggs
  • 2 tbsp coconut oil
  • 1/4 c honey
  • 2 tsp vanilla
  • 1 c zucchini (grated)
  • pinch of salt
  • handful of chocolate chips

Combine the almond flour and the cocoa powder in a mixing bowl. Stir in the salt and baking soda. Make sure it's well combined.

Add eggs, coconut oil, vanilla, and honey. Make sure the ingredients are well combined. Stir in the zucchini.

Pour the batter into a greased 8x8 pan, sprinkle on chocolate chips, and bake at 350 degrees for 35-40 minutes. Allow to cool and serve.

Monday, July 1, 2013

Cauliflower Pizza: College Style

aka Paleo pizza you don't need a food processor to make.


How excited were you reading that? First of all, PALEO PIZZA! Second of all, no food processor required. You can use one if you have one, it probably is easier and less time consuming.

Originally this recipe is from Michelle over at the Lucky Penny. She calls it "The BEST Cauliflower Crust Pizza!" I have to agree with her. I grew up making pizza dough with a recipe that required no fewer than 6 cups of flour, so I was slightly skeptical about any other pizza crust recipe, let alone a Paleo one.

Well. I shouldn't have been. This is delicious. I modified it a little bit since I don't have a

Ingredients:

  • 1 cauliflower head (or 2-3 cups of cauliflower rice)
  • 1/4 cup mozzarella cheese
  • 1 egg
  • salt
  • pepper
  • dried basil
  • dried oregano
  • garlic powder
  • 1 tbsp almond meal (optional)
  • Toppings and sauce as desired!
Wash and dry your cauliflower head. Cut off the florets and grate with a box grater. You don't want or need too much of the stem.

Cook the cauliflower snow for about 4 minutes in the microwave. I couldn't fit all of my snow into the single microwave safe bowl I own, so I used takeout containers as well. Place the snow on a clean towel and allow it to cool. 

Wrap the cauliflower in the towel and wring it out. You want to get some of the excess water out. You only need to squeeze it a few times - don't rip your towel.

In a bowl, combine the cauliflower, cheese, spices, and egg. Mix with your hands. Form the pizza crust on a greased baking sheet. Bake it at 450 F for 8 - 11 min until the top starts to turn golden.

Remove from oven and add sauce and toppings. Bake for an additional 5 - 7 minutes or until the cheese starts to brown. 

The hardest part: allow it to cool slightly for a few minutes. Enjoy!


I topped mine with tomato sauce, 3 different cheeses, and some ham. For the next one, I'm planning on ham, bacon, and spinach. I also ate the entire thing, it was so delicious. I only used about half a cauliflower head, too. I'm also planning on making one two when Super A is here next (we both eat enough that we probably need our own).

UPDATE: Here's the bacon and spinach pizza! It was for both myself and Super A, so I filled the whole pan. It probably could have used a longer cook time and I would have lined the pan with aluminum foil to make it easier to actually get slices out of the pan.

Friday, June 28, 2013

Kitchen Sink Crustless Quichezza

(pronounced keesh-za)

My food was starting to go, I had one more day to make it through until grocery shopping again, and I was out of meat and out of salad. This was also after successfully making Zucchini Noodles for the first time, and I had the inside part of the squashes left over. It was only after the squash and spinach was in the pan and I was cracking the eggs that I realized this was my first "Hey, I can actually cook!" moment. It's not so much a recipe though as a meal idea - lots of eggs, lots of veggies, some extra protein, and cheese. The end goal was something slightly quiche-y with veggies and shrimp scatter throughout, and slightly pizza-like with the cheese on top.

Ingredients:
  • Remnants of 2 yellow squash, cut
  • Spinach
  • Shrimp, pre cooked
  • Any other veggie or meat you want or need to use (it's called the Kitchen Sink for a reason)
  • 4 eggs
  • butter
  • salt
  • pepper
  • cheese (optional)
Heat the butter in a frying pan on low-medium heat. Cook the veggies. Add the meat and cook it.

Crack the eggs in a bowl and mix them. Add salt and pepper. Pour the eggs into the pan. Cover and cook on low heat.

When mostly cooked, sprinkle cheese on top of the eggs. Allow to finish cooking.

Serve immediately or let cool and refrigerate for lunch.

The center ended up essentially being veggies covered in cheese with the eggs more toward the outside and shrimp everywhere. It wasn't quiche-y at all, or pizza-like, because I didn't spread out my veggies when I poured the eggs into the pan. I do like how the shrimp are all at different places in the eggs though. Next time I'd probably add some bacon or ham and maybe some onion. Maybe I'd make it more pizza like by putting tomato sauce on top, too.

The part I liked best? It fit in my lunch container, microwaved well at work, and kept me full for a loooong time.

Zucchini Noodles!


All the recipes for zucchini noodles that I'd found said basically 2 things - use a julienne peeler and cooking is optional. None of them said anything about how to actually make zucchini noodles, and I don't have a julienne peeler.

I do have a regular peeler, though, and it did the job quite nicely.


Ingredients:

  • 2 medium/large green or yellow squash
  • little bit of butter or your choice of oil
Wash the squash well. Using a peeler, peel strips of squash. The best method I've found is to keep the ends of the squash on, hold one end, and peel from the top down. Rotate the squash and repeat until the seeds are visible. Now you have raw squash noodles!

To cook: heat the butter in the frying pan over low-medium heat. Drop in the noodles and cook until soft (3-5 minutes). Salt and pepper the noodles when partway cooked. Add toppings or mixins such as cooked shrimp or chicken, or toss it in a sauce. 

Serve immediately. I layered mine with cheese, but that's obviously up to you.

The leftover part of the squash is good for sautéing and use in other recipes, like a Kitchen Sink Crustless Quichezza.

Wednesday, June 26, 2013

Easy Peasy Fruity Salad

Last week I realized I needed to get better at making salads, considering the ones I made weren't that yummy and didn't keep me full at all.

Here's what I came up with this week:


Pardon the quality of the picture, and the fact that it's over half eaten. You can see all the ingredients though, which I like. I also found that the variety of flavors kept me from becoming bored with it after a few days. The only thing that would make this better would be a bigger bowl so I could pack more of it!

Ingredients:
  • romaine lettuce
  • spinach
  • strawberries
  • blueberries
  • mango
  • pineapple
  • 1 egg
Start with you base and build up. Make your romaine bite sized and throw the spinach on top of it. Top with the cut fruit and berries (cut up the strawberries). If your egg is hardboiled, peel it, cut it up, and add that. If you ran out of time like me, scramble an egg and cut it into pieces. Easy to transport, and probably a hit with kids for the flavors and colors. Bonus: getting a variety of fruit allows you to mix it up a little each day and keep it interesting.

Still haven't mastered a good salad dressing yet unfortunately, but it's been a little too hectic this week to try very hard. I'd love to be able to make a good Caesar salad dressing sometime soon, we'll have to see what happens!

Tuesday, June 25, 2013

Super Easy Paleo Pancakes

I had these this morning for breakfast (all of them) with some berry compote. Normally when I'm at work, I start getting hungry around 10:30, 11, and I try not to eat lunch until noon. Today I got to 12:15, looked at the clock, and realized I still wasn't that hungry yet. Neat!

These are the quickest, easiest, and possibly most flavorful pancakes I've had, possibly ever (including pre-Paleo). There was a race this past weekend that Super A did and I volunteered at, and I made these the night before so we could grab something quick at 4 am. I believe his reaction was raised eyebrows, wide eyes, and a grin - "These are the best pancakes I've ever had. Seriously." He was so disappointed after the race to find we had eaten them all.

Ingredients:
  • 2 bananas
  • 3 eggs
  • cinnamon (optional)
  • butter (for the pan)
Mash the bananas in a bowl. If you're like me and don't have a food processor, break them in half and squish them with your hands, then stir with a fork. Add the eggs and mix. Add the cinnamon for flavor and mix more. The "batter" should look pretty uniform in color, although you might see banana chunks here and there. Not a problem.

Put a pan or a griddle on the stove with low-medium heat. Melt the butter and pour some batter. The smaller you make the pancakes, the easier they'll be to handle and the better they'll turn out. When the bottom starts browning (the banana is caramelized), carefully flip using a spatula. When the other side is cooked (brown or not, doesn't matter), your pancake is done.

In total, this makes about 6-8 pancakes, depending on the size. Didn't time myself, but it's very easy to make them the night before while doing other things.

I also suspect that they might behave better in the pan if you mash the banana using a food processor, but I have yet to test this theory.

Enjoy!

Wednesday, June 19, 2013

Damn Fine Chicken and Sautéd Garlic Asparagus

I have a confession to make. You know Paleo, the eating style where you don't eat grains? I'm giving it a try. I'm not going as extreme as giving up dairy, too, because I grew up drinking milk with every meal and am not lactose intolerant in the least. But the whole not eating grain thing is hard. That means no cereal or toast in the morning, no pb sandwich for lunch (which I also grew up on), no pasta or rice for dinner, no granola bar snacks, etc.

The principal is that humans have been around for the last 150,000 years. Agriculture has been around for the last 10,000 years. Our ancestors were hunter-gatherers. They ate meat and veggies. They weren't farmers. Our bodies are still better suited for eating meat and veggies than for highly processed foods. For a better/more detailed explanation of paleo, check out Steve Kamb's website NerdFitness.*

I explained the gist of Paleo to one of my friends and she insisted she could never give up pasta and rice. She doesn't cook much, and what I have seen her cook is mostly grain based and made in the microwave or steamer. This summer, I'll be attempting to teach her how to cook. I know she likes balsamic vinegar, and what gets easier than marinading chicken and sautéing vegetables? (For those of you with limited cooking experience, don't worry, it's not as scary as it sounds.)

Here's the original website for the Damn Fine Chicken recipe, and here's my modified version:

Ingredients:
  • 2 lb of chicken breasts (making for several nights for myself)
  • 3 tbsp of balsamic vinegar
  • 3 tbsp of olive oil
  • 1 tbsp fish sauce
  • 1 tbsp soy sauce
  • Handful of chopped onions
  • Salt, pepper to season
Mix the vinegar, olive oil, fish sauce, soy sauce, onions, and seasonings in a bowl. Plop in the chicken. Using your hands (it's raw meat, wash before and after), mix the chicken in the marinade until it's well covered. Let sit for several hours. Pour the whole thing into a flat baking sheet or casserole dish and bake on 375 F (for non convection dish, 400 for convection dish) for 40-45 minutes. You'll have to turn the chicken over in the middle. Sprinkle any extra seasonings on top and enjoy!

If you're a person relatively short on time like myself, I made the marinade the night before and stuck the whole thing, chicken and all, in the fridge. In the morning before work, I stirred it up and made sure the chicken was thoroughly covered in marinade (kinda tricky because I used a bowl, would use a baggie in the future), and let it sit for the day.

Here's what else I made to go with the chicken:

Ingredients
  • asparagus
  • spinach
  • butter
  • garlic
I'd recommend waiting until after you flip the chicken before starting this. The asparagus got cut up into more bit sized pieces than the huge stalks. I minced some garlic, too (meaning cut it up into tiny pieces in one direction, then cut up into tiny pieces the other direction, then chopped finely until all the pieces were really small. I put the butter and the garlic in first, followed by the asparagus. Spinach thins down when you cook it, so you can start with something like 2 handfuls and end up with about the quantity that would fit in a Snack-Pak pudding cup (only slight exaggeration). The asparagus takes about 10 minutes alone to cook, more if you like it well done and not as crunchy. Spinach doesn't need as long. Cover the pan and stir occasionally until the veggies are done the way you like them. Serve with the chicken.

*Please read my disclaimer.

Tuesday, June 4, 2013

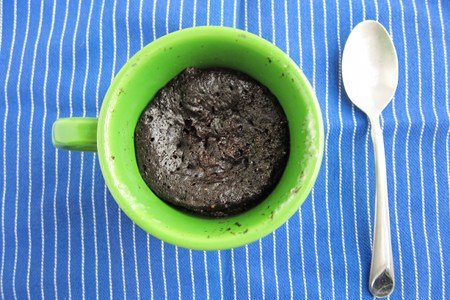
Microwave Chocolate Banana Cake

Sounds delicious, right? SnackGirl's done it again, mixing the sweet treat with the not so bad for you. This recipe uses a banana, an egg, 2 tablespoons of cocoa powder, and 2 teaspoons of sugar. It takes about 5 minutes to throw together and it makes two cakes. The nutrition facts are pretty phenomenal for  cake, too!


Here's the recipe: SnackGirl Microwave Cake

If I make any changes to the recipe, I'll post them below!